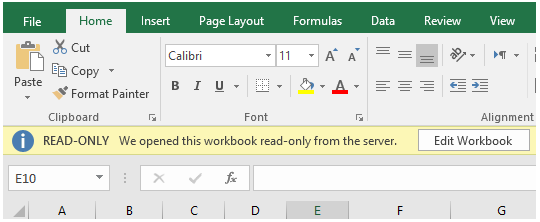
Many people protect their Excel worksheet with Read-Only mode, and there are good reasons to do that. You probably don’t want the viewer to make some changes to the worksheet, or you don’t want anyone to accidentally erase the data from the worksheet. This is why the Read-Only feature becomes so handy. What happens in a Read-Only Excel document is that it only becomes visible to people who want to go through the information on that worksheet, but they can’t make any changes.
Even though the Excel Read-Only restriction benefits the Excel worksheet owner, it causes some hindrances to people who need to work on the same worksheet. Users of the Read-Only Excel worksheet often inquire if there is a way to remove the Read-Only restriction to save the same file. If you have the same question in mind, you have come to the right place. Additionally, if you want to make an Excel sheet a Read-Only file, we will also cover this part. Continue reading to find all the answers to your questions.
Part 1: What is Read-Only Restriction on Excel?
Read-Only is a restriction that one can implement in their Excel sheet. This restriction only allows others to view the Excel worksheet but not edit any changes on it. So, once you share the Read-Only Excel sheet with someone, they will be able to open the file without any hassle and go through all the information. Read-Only restriction is added by many working professionals who often share Excel worksheets with others.
If your Excel worksheet contains information that you don’t want to be altered or changed, then adding the Read-Only restriction makes sense before handing over the Excel sheet to anyone. It’s a great feature to keep the data in the Excel sheet safe.
Part 2: How to Remove the Excel Read-Only Restriction?
If you want to remove the Read-Only restriction on an Excel worksheet, the best way to go about it is using software that will let you do that efficiently. And the recommended software to use is PassRec. PassRec is a robust tool to disable Read-Only restrictions on an Excel sheet. This is a user-friendly tool, which will remove the Read-Only restriction and allow you to save it so that you can edit the sheet as you want. Along with this, you can use PassRec to unlock an Excel sheet whose password you may have forgotten. So, it works both ways.
PassRec is a handy tool that is available for Windows computers with version 10/8.1/8/7. Moreover, using PassRec is pretty easy, and you don’t need any technical knowledge to start using it. All you will have to do is follow Passper’s instructions and finally get rid of the Read-Only restriction.
Here are some restrictions of PassRec:
- Passper allows you to remove Read-Only restrictions in all possible cases.
- Passper has a 100% success rate and can remove restrictions from any Excel worksheet.
- Passper is very easy to use and has an intuitive interface.
Now that you know about the features of PassRec, please follow the following steps to start using PassRec.
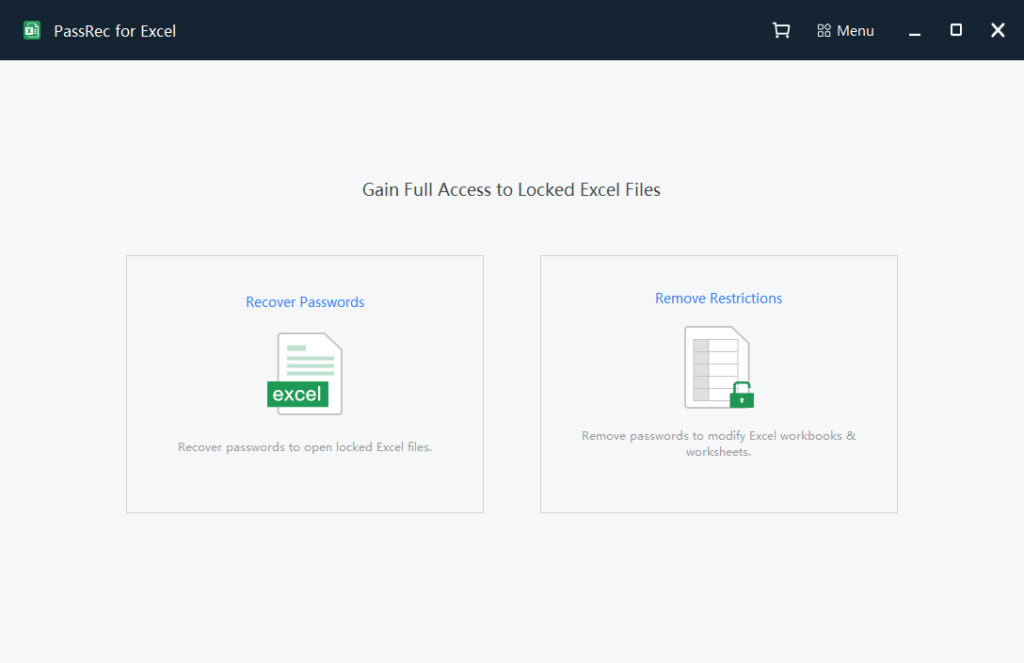
Step 1: Visit the official website of PassRec and download the software. Once downloaded, install PassRec. After that, you need to launch PassRec on your computer. The main screen will show you two options- Recover Passwords and Remove Restrictions. Please click on the Remove Restrictions option.
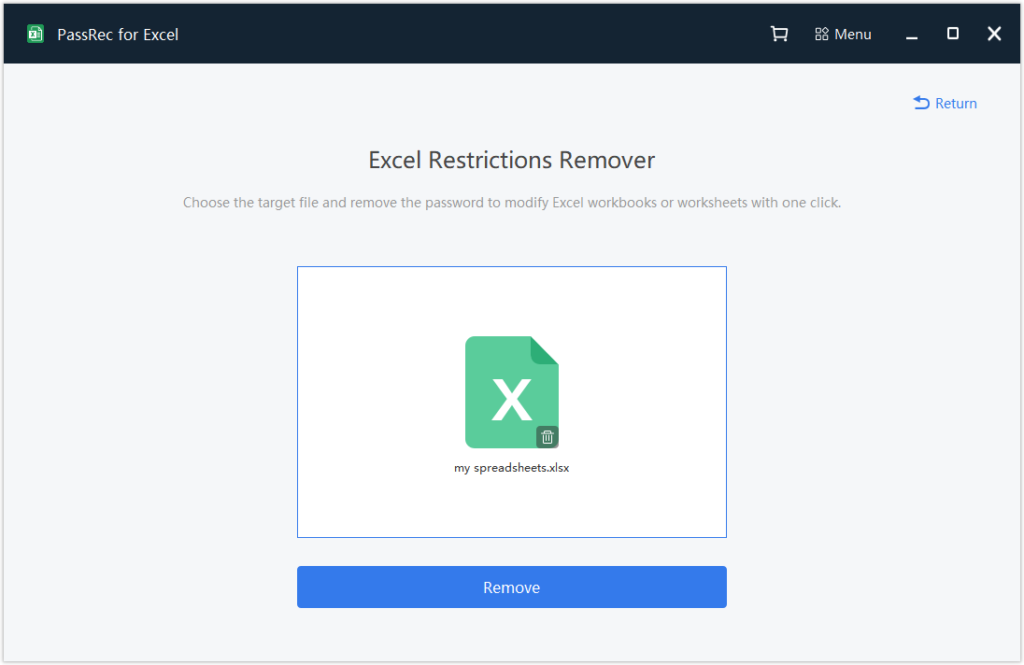
Step 2: Add the Excel sheet that has the Read-Only restriction. Once the file is added, you need to click on the Remove option. PassRec will some time to remove the restrictions.
Step 3: PassRec will begin to remove the restriction, and while the tool is removing the restriction, please don’t cancel the PassRec recovery page. After everything is done, please click on the back to home option.
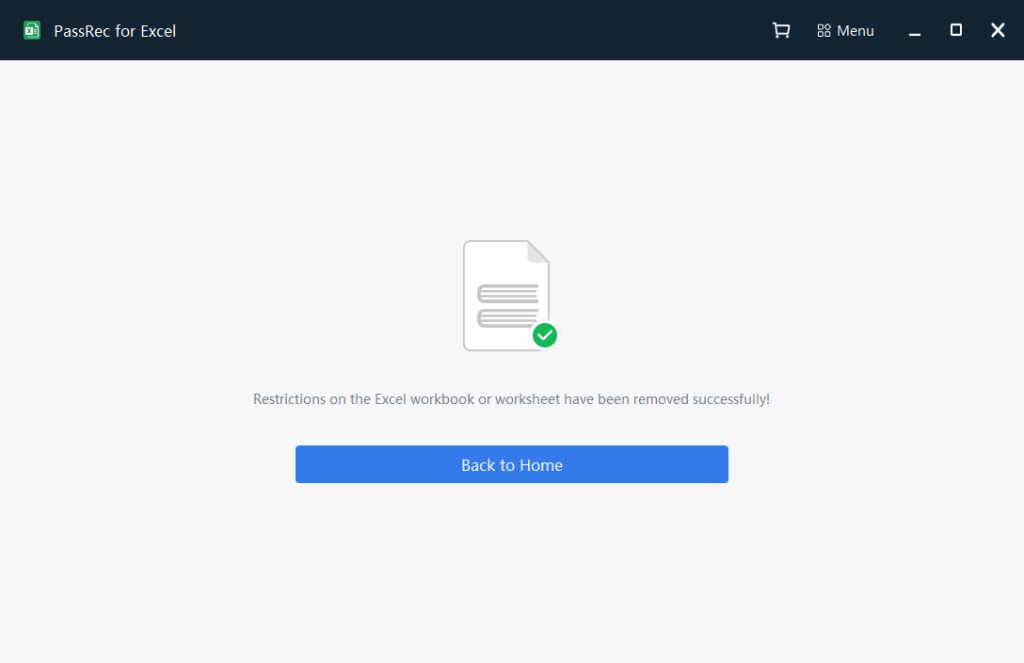
And by following these steps, you will be able to unlock Excel for editing.
Part 3: How to Make Excel Read-Only?
You can make an Excel read-only easily. Excel allows you to do that. However, please note that you can’t save the Excel sheet because the file will be read-only. This section will guide you on how to mark an Excel sheet read-only. Follow these steps:
Step 1: First, you need to open a workbook. Then click on the File option, which will be towards the top left.
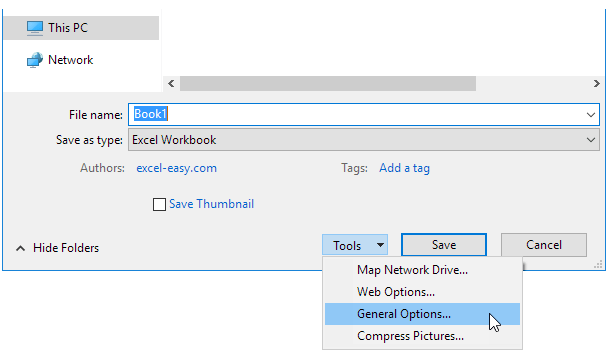
Step 2: Please click on the Save As option and then hit the Browse option.
Step 3: You will see the tools option. Please click on that, followed by the General Options.
Step 4: You will now see a window where you will have to add a password for the Excel sheet. Please enter a password and then click on the OK option.
Step 5: You will be asked to re-enter the password. Please do that and hit the OK option.
Step 6: Finally, give a name to the Excel worksheet and click on the Save option. And that’s it. All done!
Part 4: Why Can’t Excel Open Even When It’s Read-Only?
There can be a few reasons why your Excel won’t open even if it says Read-Only. Here are some of the reasons that could be affecting the Excel worksheet.
Reason 1: When someone makes some spreadsheet settings, it can prevent people from opening the sheet. Some people can enable the protection by adding a password. You will have to select the Unprotect option and add the password to remove the read-only restriction to open it.
Reason 2: If the Excel sheet is corrupted, you may face some problems opening an Excel with the Read-Only option. If you have checked the Excel worksheet and the settings and if everything looks fine, then the Excel sheet might have been corrupted, which is why you can’t open the Excel even with the read-only restriction.
Reason 3: The third common reason could be location. If you are using the Excel sheet within the same network, but the network is not permitting you to make any changes, even in this case, you won’t be able to edit the Excel worksheet and only view it.
You will need permission to start editing the Excel sheet. Here are some of the fixes that you should try:
Solution 1: The easiest way to get rid of the read-only restriction is to remove this restriction. You need to right-click on the Excel sheet that had the read-only restriction. From the options that are shown to you, you need to click on the Properties tab. After that, locate the read-only attribute and uncheck it. Finally, click on the OK option.
Solution 2: Sometimes, antivirus may also not let you open an Excel worksheet. It has been found that some antivirus can restrict users from opening read-only Excel worksheets. So, to handle this problem, you will have to launch the antivirus and make some adjustments to it. Once you do that, you should be able to open the Excel worksheet normally.
Solution 3: Whenever you try to open an Excel sheet in an unsafe location, such as downloaded from an unknown third-party source, Excel sheet received via email, and the internet, then also the Excel sheets can be labeled as read-only. This is done to keep the Excel sheet protected from getting altered. So, what you need to do is go to Excel and turn off the Protected-View option. Once you do that, you should be able to use the read-only Excel worksheet without any hassle.
Conclusion
Now you know how to make Excel read-only and how to disable it. Along with that, we have also talked about some of the situations that may cause an Excel read-only file. Follow the solutions that we have mentioned, and don’t forget to download PassRec to set your Excel worksheet free from all kinds of restrictions so that you can start using it and editing it normally. To download PassRec, please visit the official website.